
Whipped up a little (read: way too big) beer cap project the other day. Ben & I are avid beer drinkers (and brewery tour-ers) & I’ve been collecting caps for a while now, so we had quite a few ready to go.
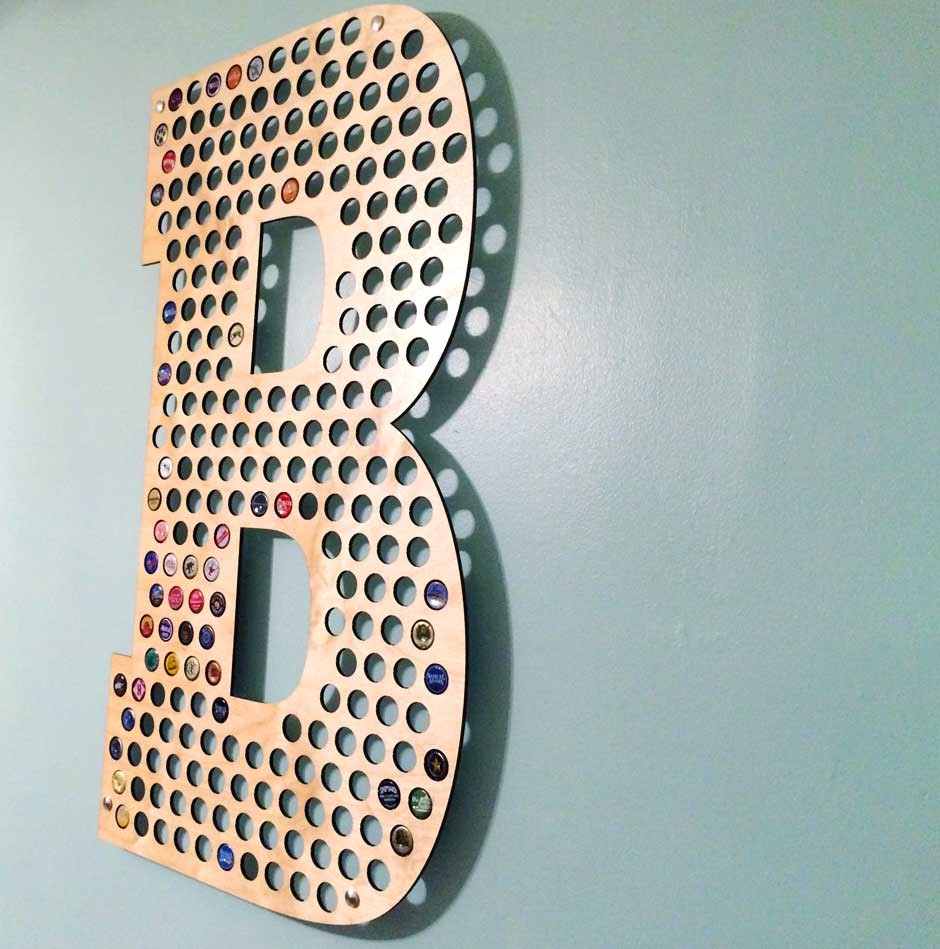
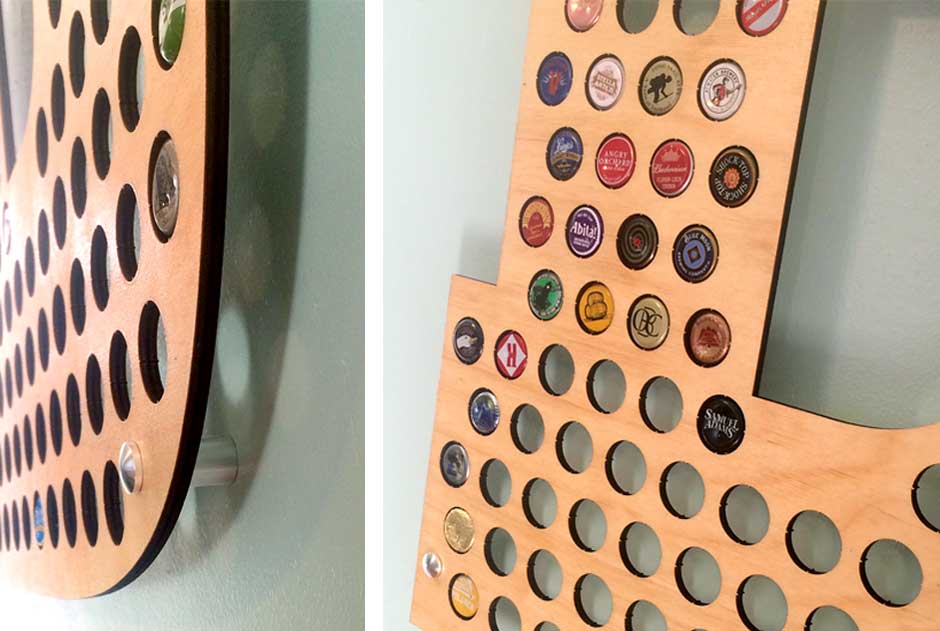
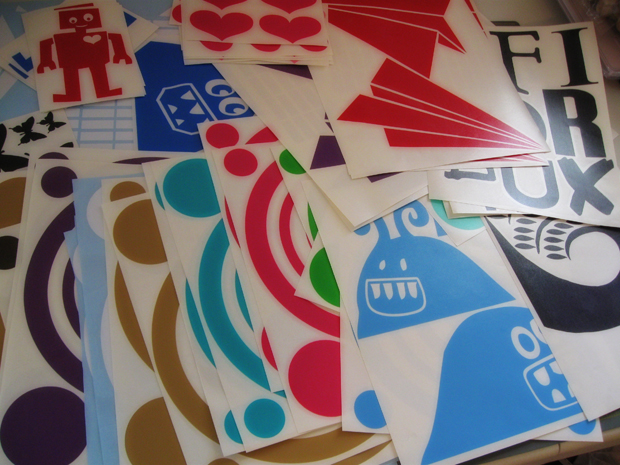
This beer cap initial letter was laser cut from 1/4″ birch plywood. It’s mounted on the wall with standoffs, which allows for just enough space for caps can be pressed into it from the back. This thing is pretty massive – maybe 3′ tall? I believe there are over 250 slots (woo!).
See process photos after the jump.
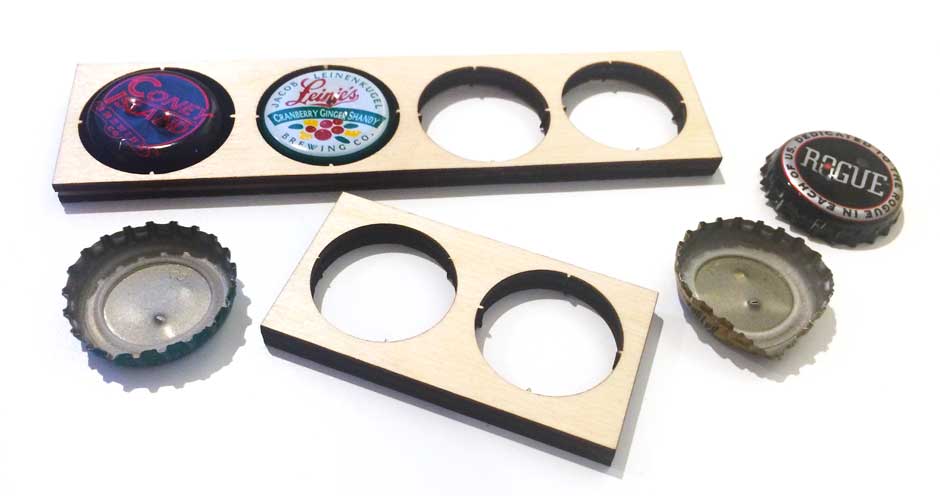
I created the art file in Adobe Illustrator & we laser cut a few test holes from the birch plywood to figure out the optimal size for some of the beer caps we had handy. I believe the final diameter was around 27mm, with 4 mini notches.
The vast majority of our caps were able to be crammed into this size, with the exception of a few hard root beer bottle tops – those were all too small & fell out.
Side Note: The Cranberry ginger shandy (bottle cap pictured above) was without a doubt my favorite new beer that I tried this winter. Very light, but delicious.
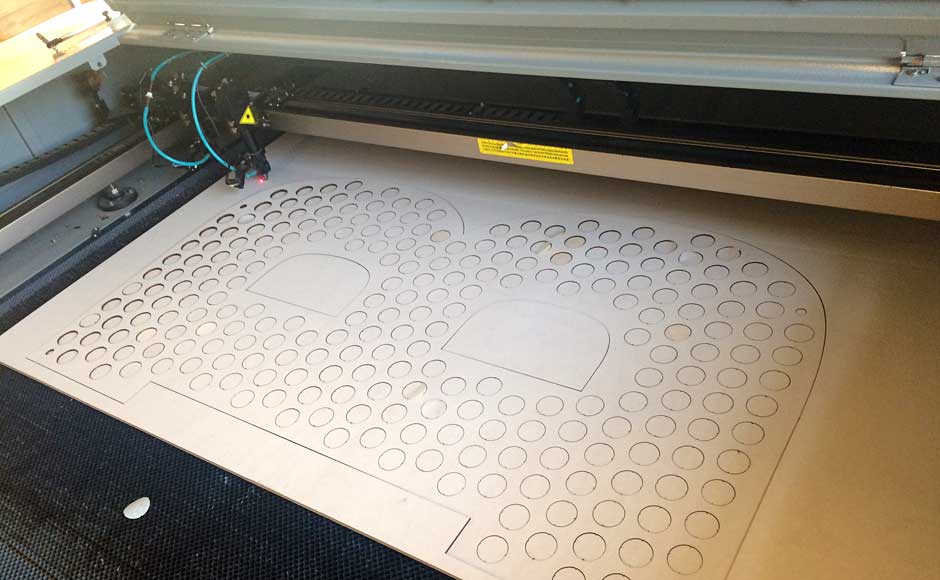
After finding optimal dimensions & laser settings, I applied a layer of masking to our sheet of plywood (to prevent burn marks on the face of the piece) & we let the laser cutter do it’s thing.
We have a pretty large piece of equipment in our studio. It’s a dual head, 120watt beast of a machine. This project took somewhere in the ballpark of an hour to cut.

A few more shots from the bed of the laser cutter. We had a few stubborn holes that needed to be pressed out with a finger after the fact.
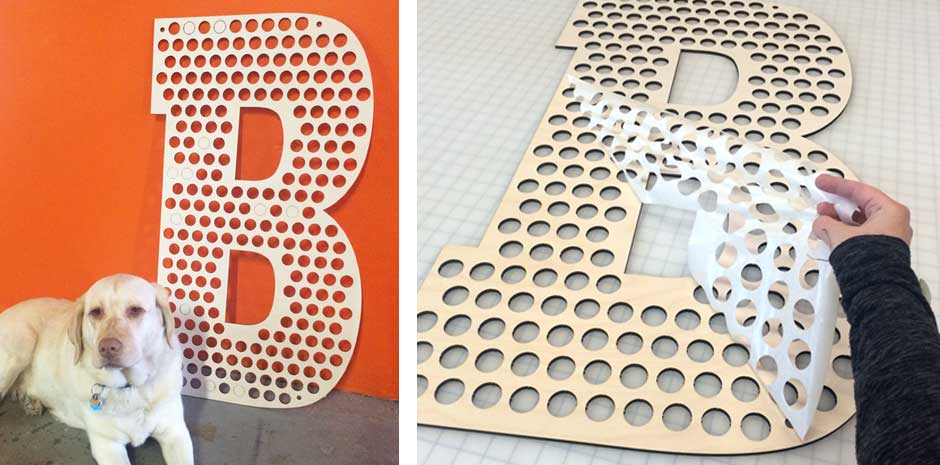
Ginger, our very unimpressed looking Labrador, included for scale.
The photo on the right shows the masking tape being pulled off, revealing a nice, smooth finish – no burn or smoke damage on the face of the board.
 The board was sealed with a clear satin polycrylic finish and then hung on our kitchen wall after curing.
Standoffs are the perfect hardware solution for a hanging a project like this. The letter stands about an inch off the wall & throws an interesting shadow depending on what angle the light hits. You can find standoff hardware here.
No Comments